|
|


|
|
For Contact Information:
CONTACT
|
|
Website
design by:
Jenifer Holcombe
Soykan |
| |
| This site is dedicated to recreational sleds used to
slide down hills. This section will attempt to address a variety of
issues concerning the sleds, first of which is care of sleds and
rehabilitation of those sleds that need it. We are aware that for
the most part we are dealing with antiques, but this is not the place to
enter the controversy of "attic condition" verses
"restoration." Rather, that resolution is left to the
individual owner. The purpose here is to set forth the methods owners
use to enhance and protect sleds, and to illustrate some results.
CARE AND REHABILITATION
|
| ROUTINE CARE Joan Palicia, in her
book Flexible Flyer and other Great Sleds for Collectors, (Atglen
PA: Shiffer
Pub Ltd, 1997) p. 7, recommends against restoration and suggests that
the owner wash the sled with mild soap and to sometimes use light varnish
to keep the trademark from flaking. The use of a good cleaner such
as Murphys Oil Soap or a similar product can remove a lot of accumulated
grime. Whether varnish should be used is matter of judgment.
As will be discussed below, many of the early sleds were finished with
shellac and a decision must be made about compatible finishes.
CLEANING Art Bransky, see Art's Slope, is a serious
sled enthusiast who prefers to not see restoration. He has developed
an aggressive cleaning of the shellac surfaces that returns many an old
sled to the luster of earlier years. Rather than repeat his methods,
the viewer is invited to contact him directly for more information.
REPAIR Inevitably a sled will be found with
damage. While bent metal runners can be carefully straightened and
cracked wooden surfaces glued, the biggest problem of repair is a broken
side rail. This often occurs at the point of an unsupported midpoint where
a rivet was used to attach it to a cross piece. The rivets are
usually 3/16 in diameter and are not generally available. Sometimes a 3/17
carriage bolt can be substituted, but it is better to hunt down a
replacement. Deen Watson, Slope contributor, has been willing to part with
some of his supply. See RIVETS on
Waton's Slope P 3.
REFINISHING It may be that most early sleds were
finished with shellac, but some furniture restorers advise that shellac is
not a stable finish. The owner might well consider a modern finish with UV
protection if refinishing is to be done.
This section will describe several aspects of the resurfacing of
sleds with metal runners. For a beautiful example of restored wooden
sleds of an earlier time, the viewer is encouraged to follow the link to
the Canacadea Sled Shop by Lyle Palmiter. The artwork is truly beautiful.
http://www.infoblvd.net/sledman/home/home.htm
Metal Runners We have found that sandblasting is the
method of choice when the metal runners have significant rust. A skilled
sandblaster using a cabinet (usually someone who restores cars can be found)
can strip the metal of all rust. This will leave a bare surface to
be repainted first with a spray rust inhibitor primer, followed by a good
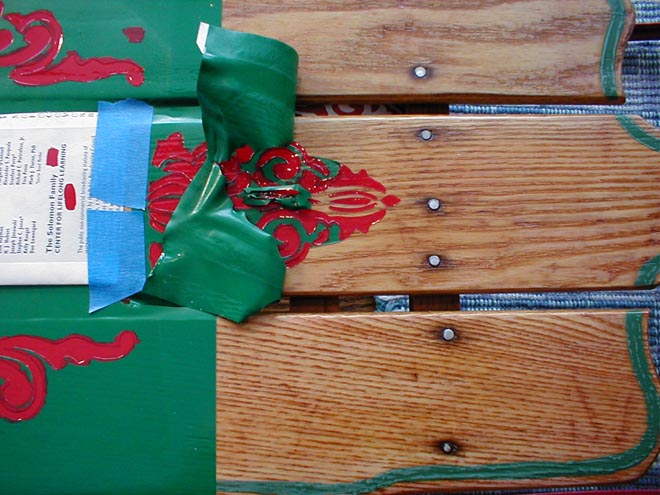
automotive finish of the correct color. The wood should first be
protected against the harsh sandblasting. Our expert recommended
first covering the wood with masking tape and paper or cardboard, followed
by a layer of duct tape. The first layer prevents the very sticky
duct tape from adhering to the wood.
Wood Surfaces The surfaces we have refinished thus
far were significantly deteriorated, but the structures were sound. They
were sleds that deserved a second life! As Art Bransky has
suggested, denatured alcohol can be lightly used to remove the shellac as it seemed
to turn to glue when sanded. In several cases the wood had turned
very dark, sometimes like the side of an old barn. A good wood
bleach returned the wood a good way toward its original color. We
live in an area where there is a lot of restoration of antique boats so we
took a page from them and used marine polyurethane finishes with UV
protection. This produces a very hard surface and applied by spray
can, gave a very nice low luster similar to shellac.
|
| Graphics Reproducing the graphics on the
sleds is the hardest part and likely the one to have the greatest
variation from the original sled. If there is nothing or very
little that is visible, the enthusiast will have to find a model. At
least three different challenges can be met, including detail stripping,
ornate scrolls, and logos such as the eagle on the Flexible Flyers.
Here is what we have tried with some success, such as the viewer can judge
by looking at Jon's Slope P 1.
The stripes, usually along the edges of the sleds, can be masked
and painted. Before painting, we found that applying a thin coat of
the finishing material on the deck (polyurethane in our case) would seal
the edge of the tape to prevent bleeding underneath the edge. This
gave a much cleaner edge.
|
| Logos are not generally available to use for
replacement. We found that the logos applied in post Philadelphia Flexible
Flyers did not hold up and some were cellophane decals that were coming
off. One method that seems to be working is to photograph a mint logo,
shape and size it with a good computer program, and then print it on
photographic transparency paper or label paper with an adhesive back. After a few light spray coats of
polyurethane it became water proof. A test item survived our
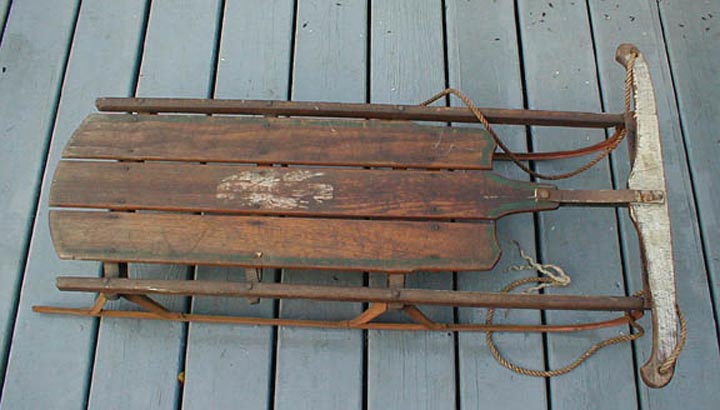
dishwasher. The example at right is from the No 2 sled, probably
from before 1908 since it has flat runners.
|
 |
|
No 2 Sled in original condition We could see enough of the
original graphics to identify the pattern and copy it from a picture into
a photo editing program.
|
 |
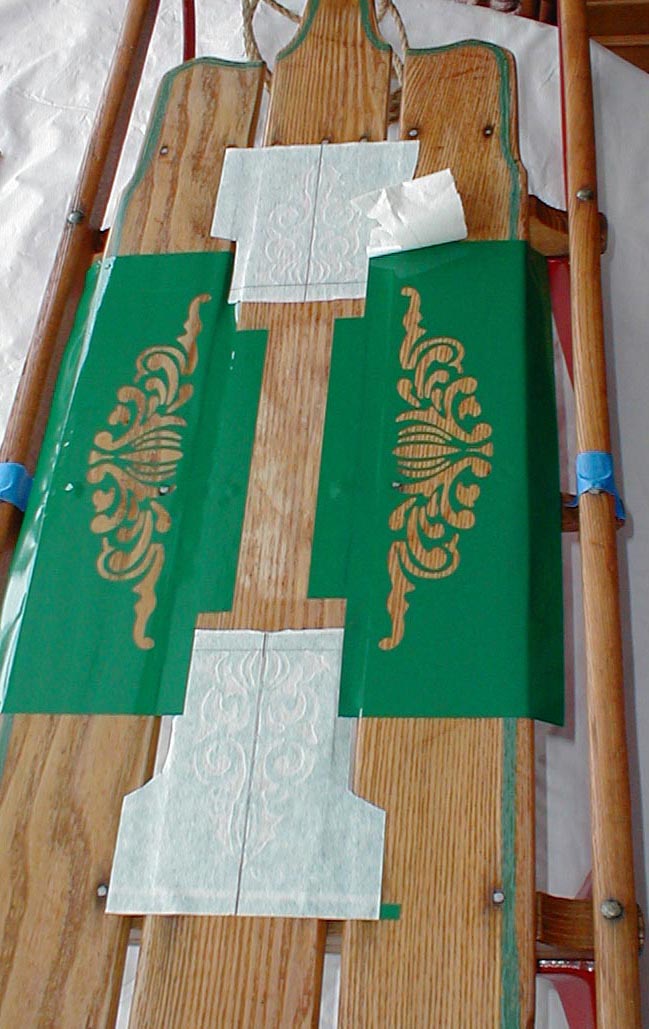
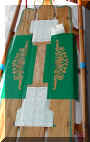
| No 2 Sled after refinishing with Stencil After
replicating and fine tuning the pattern of the scroll work with the photo
editor, prints were made and given to a sign technician. She created
stencils from the patterns by using a plotter. The stencil has a sticky
surface that adheres to the deck. It was lined up with pencil marks on the
paper covering the stencil. Once in place the paper cover was removed for
painting. |
 |
|
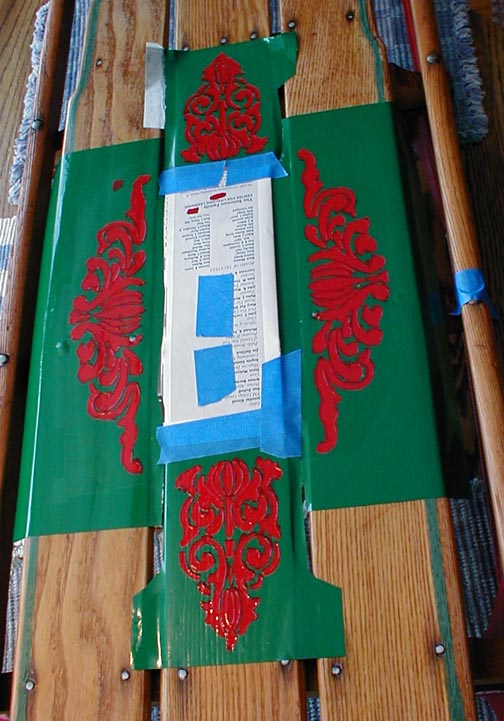
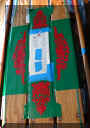
No 2 Sled with Stencil painted After first
sealing the edges of the stencil, two coats of quality paint were applied
and allowed to dry.
|
 |
|
No 2 Sled with Stencil partly removed By
carefully pulling the stencil back against itself, the paint remained with
clean edges. A light sanding smoothed the edges and a couple of thinly
sprayed on finish completed the graphics.
|
 |
|
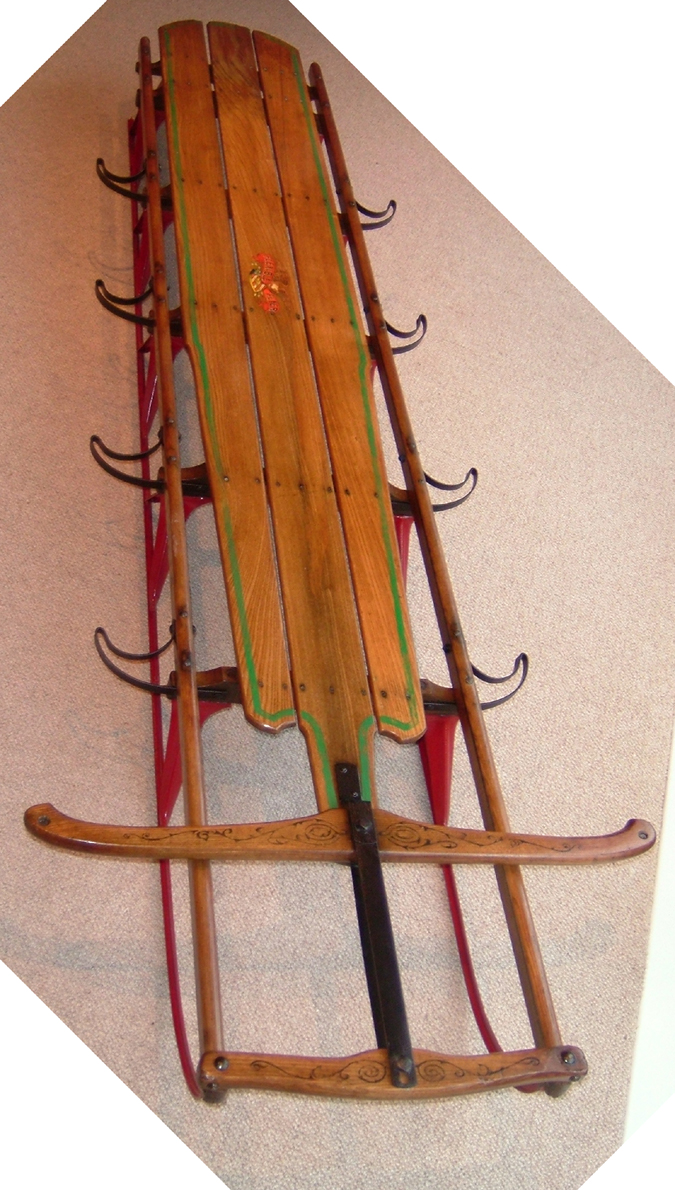
No 2 Sled - final product Almost! The sled had white paint
on the handle when we acquired it. Although careful attention was
given during the paint removal, we could not make out the pattern of the
graphics underneath. We are still looking for a good model for
replicating what was there.
|
 |
|
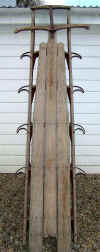
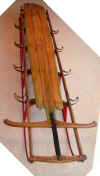
No 6 Sled - a great restoration from Scotland. This
sled dates from the very early 1900s, probably 1900 - 1906. The
owner writes the story:
"I had seen these sleds on US Ebay --very
expensive and I presumed quite rare . I never thought I would see one in
this country let alone own one.
Flexible Flyers are rare on Ebay in the UK and one evening I idly
typed in Flexible Flyer and was amazed to find an eight and a half foot
sled for auction. Not only that , it was located about 1 1/2 hours
from where I live. I
was successful in my bidding but only just, being outbid in the last 25
secs. It transpired
the competition was bidding from Switzerland so there is obviously an international interest in these sleds.
Fortunately the sled was more or less complete. One runner had a
large agricultural riveted period looking repair at the front right
support bracket which I welded. The bumper bar had been replaced but
not riveted thus the steering did not function. I made a new one and
riveted it as original. The centre deck board was missing a piece at the
tail at the second last nailing point . I scarfed a new piece onto the
original .The metal work was
given a light sand blasting and came up well . I finished the sled
with satin polyurethane varnish including the metal which helped take
away the 'new' look. And that's the story of my No. 6" -
Tom Abernethy, Scotland
|
Original Condition
Restored
|
Last updated: December 1, 2007
|